
How to Make an Escape Room at Home (Step-by-Step, No Locks Needed)
To make an escape room at home, pick a story your players already love, build about eight simple puzzles from paper and things in your kitchen, then chain them together so each answer reveals where the next clue is hidden. You need no locks and no special equipment. Budget a few hours of prep and under $25.
- Start with a story — a mission and a deadline.
- Count your puzzles — about eight fills an hour.
- Make the puzzles from paper and kitchen odds and ends.
- Join them into a chain — each answer unlocks the next hiding place.
- Lock things up with taped boxes and sealed envelopes.
- Set the mood, and write your hints down in advance.
- Play it through yourself once, then run it.
Short on time? Grab the free printable planner further down, or start from a ready-made home escape room kit.
In our family we've always loved board games and puzzles, but for my oldest son's 14th birthday I wanted to do something completely different: a real escape room, in our own house. We were tired of restaurants, movies and bowling, and I wanted something we could all do together without spending a fortune.
It was a bit of a project, but honestly? Worth every minute. Our living room turned into an hour of mystery, codes and a lot of laughing, and the first thing my son said afterwards was "can we do it again with my friends?"
So here's how you can do the same. Nothing here needs a big budget, power tools or any experience. Mostly you need paper, a few things from the kitchen, and one quiet evening to plan it. I'll walk you through the seven steps, show you four easy puzzles you can copy as they are, and tell you the couple of things I got wrong so you don't have to.
Step 1: Start with a Story
Like any good film, you start with a story. My son loves making (and eating) pizza, so ours became a hunt for a legendary lost pizza recipe. When they finally found it, we made that pizza together. That moment at the end was the part everyone remembered.
Pick something your players are already mad about, because the theme hands you the puzzles for free. A pizza story gives you notes hidden in flour and secret writing revealed with spices. A fairy story gives you broken spells and magic dust. A spy story gives you codes and a briefcase.

You don't need to write a novel. Two or three sentences on an index card is plenty, as long as it has:
- A mission. Find the lost recipe. Wake the sleeping fairies. Catch whoever stole the cookies.
- A reason to hurry, like a spell that breaks at midnight. The clock is what makes it feel like a real escape room.
- A bit of silliness. It really doesn't have to make sense. "The toys have taken over the house" beats a serious plot every time.
Can't think of one? I wrote up 20 escape room themes with a ready-made story for each — secret agents, magic quests, detectives, pirates and more. Borrow one and change the names.
Here's a story-led room you can look at as an example. It's ready to play, made for ages 8 and up, and needs nothing but a phone:

Step 2: How Many Puzzles Do You Need?
This is the bit I got wrong the first time. I made four puzzles, felt very pleased with myself, and the kids finished the whole thing in under twenty minutes.
Here's the shortcut: about eight puzzles fills an hour. Five or six is plenty for little ones, who are happy with a shorter game anyway. And make one or two more than you think you need, because a group will always fly through the puzzle you were sure was the hard one.
Step 3: Make the Puzzles
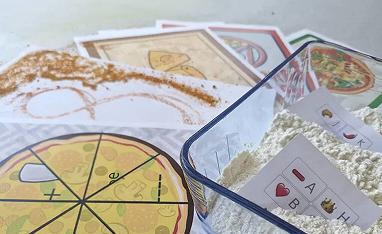
Now the fun part. I promised myself I'd use mostly things we already had in the house, and it turned out to be no problem at all. The one thing that really matters: keep the puzzles inside the story. In our pizza room, the clues were buried in a tray of flour and revealed with paprika. Same puzzles, different theme, half the magic.
Here are four that always work, in the order of least mess to most mess. You can lift them exactly as they are.
1. The jigsaw with a message on the back
Print a picture that fits your theme, write the next clue on the back of the sheet, then cut it into five or six pieces and scatter them around the room. The players have to find every piece and put the picture together before they can read what it says. Easy to make, works for any age, and it's a lovely first puzzle because everyone can join in. See the full version and a printable template.
2. The invisible message (my favourite)
Write your clue on white paper using a white candle, pressing firmly. Nothing shows. When the players sprinkle "magic powder" over the page — really just paprika or another colourful spice — the message appears. It costs nothing, takes two minutes to prepare, and gets the biggest gasp of the whole game every single time. Other ways to do invisible writing.
3. The cipher wheel
Two paper circles, one smaller, pinned together in the middle with letters around the edge of each. Turn the wheel to the right starting letter and a scrambled message turns into real words. Kids from about ten find this properly thrilling, and grown-ups love it too. You don't have to draw it — print our cipher wheel and cut it out.
4. The search in a jar
Remember digging for sweets in a bowl of flour as a kid? Same idea. Fill a jar or a tray with flour, rice or lentils and bury a small key or a folded note inside. It's messy, so put a towel underneath, and it's the one the youngest ones will talk about all week. See it here.
Four is enough to get going, and you need a few more to fill an hour. I've written up 26 escape room puzzles and riddles with instructions for each one — pick whichever suit your theme. If you want two more crowd-pleasers, try the clue frozen inside a ball of ice and a word search with a hidden message.
And if you'd rather skip the making altogether, "The Lost Recipe" below is our pizza room, packaged up. You print the puzzles and follow the instructions for where to put them. No locks, no special equipment, just things you already have at home:

Step 4: Join the Puzzles into a Chain
You've got a pile of puzzles. A pile of puzzles isn't a game yet. What makes it a game is that each answer tells you where to look next.
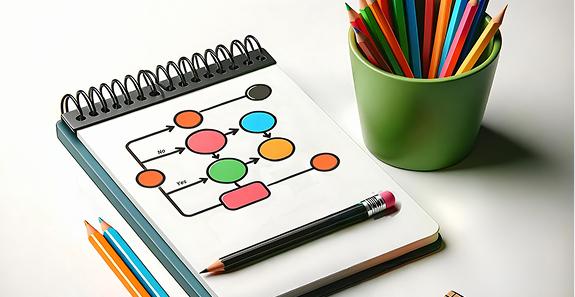
Before you set anything out, write it down as a little chain on one sheet of paper: the puzzle, where you're hiding it, and what the answer leads to. Ours went like this.
| # | Puzzle | Where it's hidden | Answer | What it unlocks |
|---|---|---|---|---|
| 1 | Jigsaw with a message on the back | Pieces scattered around the living room | A picture of the pantry | Tells them to search the pantry |
| 2a | Search in a tray of flour | Pantry shelf | First two digits: 4 and 7 | Half the code for the taped box |
| 2b | Invisible message (candle wax + paprika) | Taped under the kitchen table | Last two digits: 2 and 1 | Other half of the same code |
| 3 | Taped shoebox, code written on the tape | On the counter, in plain sight | 4721 | The "chef's notebook" and a cipher wheel |
| 4 | Cipher wheel decode | Coded message inside the notebook | "ABOVE THE FRIDGE" | Which cupboard holds the recipe |
| 5 | The finish | Cupboard above the fridge | The lost recipe | We make the pizza |
Note rows 2a and 2b: two puzzles running at the same time, both needed to open the same box. That is the bit that makes a group feel like a team.
The jigsaw pieces were scattered round the living room, and the assembled picture pointed at the pantry. In the pantry, a tray of flour hid two of the numbers for a taped-up box; the other two numbers were written invisibly on a page taped under the kitchen table. Those two puzzles happened side by side, so half the kids were digging in flour while the others sprinkled paprika. Both groups needed each other to open the box, which is exactly the feeling you're after.
Inside the box was the "chef's notebook" and a cipher wheel, which decoded a message telling them which cupboard held the recipe. And then we made pizza.
Two things worth knowing:
- Tidy the room first. Anything lying around that isn't a clue becomes one. Mine spent eight minutes investigating a lamp.
- Don't let one puzzle block everything. If the whole game stops when they can't crack one clue, a single stuck moment ends your evening. Keep a hint ready to move them along.
Free Printable Escape Room Planner
This is the sheet I actually use. Fill in the chain first and the rest of the build becomes obvious — you will spot a puzzle with no answer, or two clues pointing at the same drawer, before you have spent an evening making them.
| # | Puzzle | Where it's hidden | Answer | What it unlocks |
|---|---|---|---|---|
| 1 | ||||
| 2 | ||||
| 3 | ||||
| 4 | ||||
| 5 | ||||
| 6 | ||||
| 7 | ||||
| 8 |
| # | Gentle nudge | The answer |
|---|---|---|
| 1 | ||
| 2 | ||
| 3 | ||
| 4 | ||
| 5 | ||
| 6 | ||
| 7 | ||
| 8 |
- Every answer in the chain leads somewhere. No dead ends.
- Nothing is hidden in a place an earlier puzzle already sent them to.
- All your codes are written on one slip of paper, in your pocket.
Step 5: Locking Things Up (Without Buying Anything)
People ask me what equipment they need for this, and the honest answer is almost none. A lock is just a way of saying "you can't have this yet", and there are lots of ways to say that.
- A taped box. Tape a shoebox shut and write the code on the tape. They tell you the code, you let them cut it open. Free, and it works beautifully.
- A sealed envelope with the answer written on the outside. Opening it without saying the answer is cheating, and kids take that surprisingly seriously.
- An old phone, with its passcode set to the answer and the next clue saved in the photos.
- You. They bring you an answer, you hand over the next thing. Simplest of all, and it lets you keep the game moving.
- One real combination lock, if you fancy it. They're a few dollars, and the click when it opens is genuinely exciting. Entirely optional.
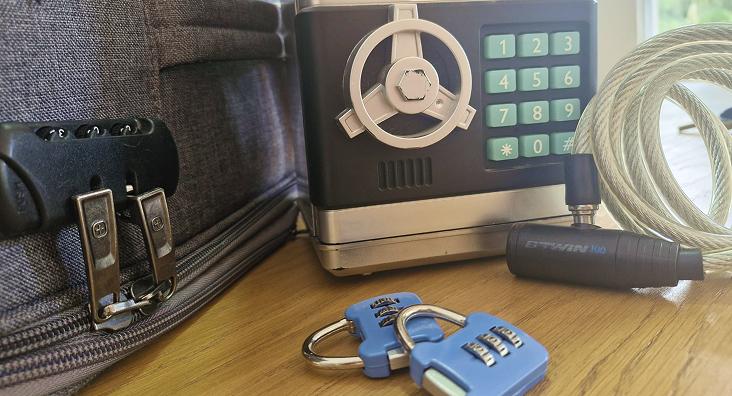
Keep the codes short — three or four digits, or one word — and write them all on a slip of paper you keep in your pocket. Forgetting your own code in front of eight excited children is a very particular kind of embarrassing.
If the safe is the bit that appeals to you, there's a ready-made version of exactly this idea. In "Crack the Safe" one phone becomes the safe, and every puzzle the players solve gives them one more digit of the code. You pick which puzzles to use, so you decide how hard it is and how long it runs — which makes it a nice halfway house between building your own and buying one:

Step 6: Mood, Music and a Couple of Hints
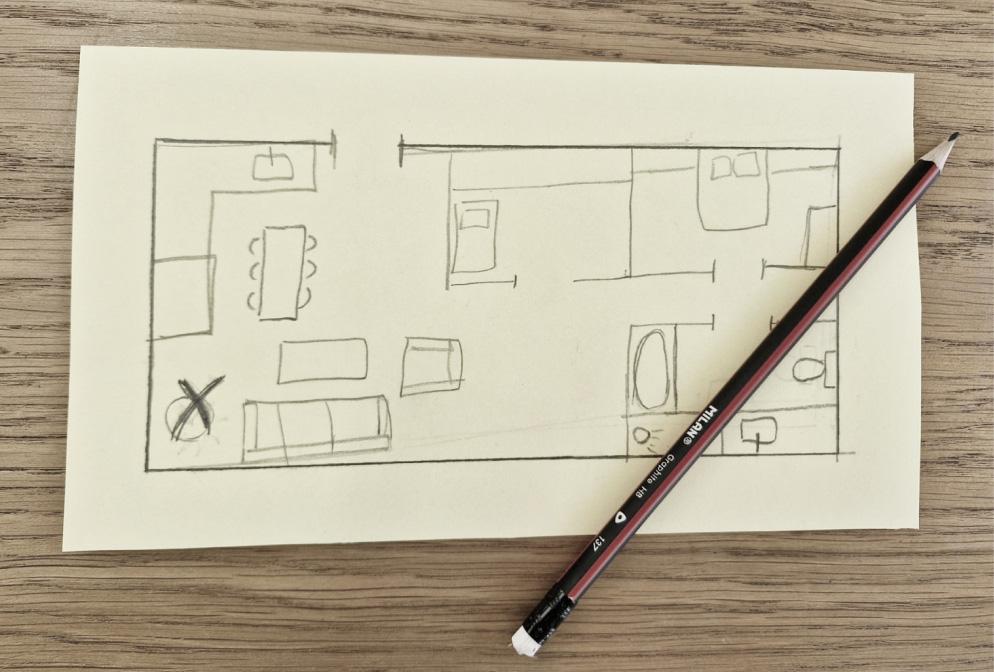
In the end it isn't only about puzzles, it's about the feeling — and that part is nearly free:
- Something mysterious playing in the background.
- Curtains closed, one lamp on, or a few candles.
- A prop or two that fits the story — an apron, a lab coat, an old suitcase.
- A poster on the wall, or a folder marked "secret".
- Snacks at the finish line. Everything is better with snacks 😉
Two small things while you're placing the clues: hide them at your players' eye level, not yours, and keep the game to one or two rooms. Spread it over the whole house and they'll spend the hour walking instead of thinking.
Then, before they arrive, jot down a couple of hints for each puzzle — a gentle nudge ("have you had a proper look in the kitchen?"), and the actual answer for when you need it. This is the thing that saves the evening. The usual way a home escape room goes flat is a group stuck for a quarter of an hour on the puzzle you were proudest of. My rule: if nothing has happened for five minutes, I give the first hint without waiting to be asked.
Step 7: Try It Once, Then Play
The night before, walk through the whole thing yourself, out loud, in the order the players will. You'll always find one clue that only makes sense because you already know the answer. That's the whole reason to do it.
On the day, all that's left is:
- Put every puzzle in its place and tidy round it.
- Codes and hints in your pocket.
- Timer and music ready on your phone.
- A spare printed copy of anything that could get torn or spilled on.
- Anything precious or breakable out of the room, and off-limits drawers marked.
- Something waiting at the end — a prize, the cake, pizza.
Running it more than once at a party? Take a photo of everything before the first group arrives. Putting it all back from a photo takes five minutes; trying to remember takes twenty.
Our first time was a full hour of adventure, laughing and a real sense of we-did-it — and then a request to do it all again with friends and a new theme. If that's where you're heading too, I wrote a separate guide to running an escape room birthday party at home.
Little Kids, Big Kids, Grown-Ups
The same story works for almost any age. What changes is the kind of puzzle and how long it runs.
Around five to seven, stick to looking and finding: pictures to match, things buried in a tray, colours and counting, a simple maze. Keep it to twenty or thirty minutes and expect to help.
Eight to ten is the sweet spot. They can handle a simple code, a jigsaw, a word search, and they'll happily go for forty minutes. Searching is still what they love most at this age, which is the idea behind "The Lost Fairies" — nine fairies have escaped from a bottle in the attic and hidden around the house, and each one has to be found and put back before the portal closes. It uses bowls, a tray and a couple of cereal boxes from your own kitchen:

From about eleven, bring in the cipher wheel and secret messages hidden inside a page of text. They want to feel clever, so let a clue take two steps.
Teenagers and grown-ups want to be properly challenged. Make them work out a code from a few scattered hints, chain a couple of puzzles together, and leave one thing in the room that looks important and isn't.
And for a family with a big age gap — the usual situation — don't settle on a difficulty in the middle. Run an easy puzzle and a hard one at the same time. The seven-year-old digs in the flour while the adults break the code, and they need each other to open the box.
What You Actually Need
Almost all of this is already in your house. Here is the whole list for an eight-puzzle room, with what each thing is actually for.
| What | How much | What it's for | Cost |
|---|---|---|---|
| Printer paper | 15–20 sheets | Puzzles, clue cards, the story card | Pennies |
| Pens and markers | A few | Writing clues and codes | Have it |
| Scissors and masking tape | 1 each | Cutting the jigsaw, taping boxes shut | Have it |
| Envelopes | 4–6 | Sealed "locks" with the answer written on | Have it |
| Boxes, jars or tins | 2–3 | Hiding things and locking them up | Free |
| Flour, rice or lentils | Enough to fill a tray | The search-in-a-jar puzzle | Have it |
| White candle + a colourful spice | 1 candle, 1 jar | The invisible message | Have it |
| Your phone | 1 | Timer, music, and an old one can be a "safe" | Free |
| Props and a dimmable lamp | 1–2 | Mood. Nice, not necessary | $0–10 |
| 4-digit combination lock | 1 (optional) | The click kids love. Entirely optional | $5–10 |
Realistically: nothing at all if you already have paper and tape, and rarely more than $25 even if you buy the lock and a couple of props.
What you don't need: electronics, real padlocks, drilling, or anything screwed to a wall. If a guide tells you to build a fake wall, close the tab and come back here.
5 Things I'd Tell a Friend Before Her First One
- Make more puzzles than you think you need. Mine finished my first room in eighteen minutes.
- Work out the chain before you make anything. Otherwise you end up with five lovely puzzles that don't connect to each other.
- Don't put eight kids on one line of puzzles. Three will solve, five will get bored and start taking the sofa apart.
- Write your hints down beforehand. Made-up hints either give the whole thing away or don't help at all.
- Give it a proper ending. A note saying "you win" is a bit flat. Let them find the recipe and then cook it, or the key to the cake tin.
Making Your Own vs. a Ready-Made Kit
I make rooms from scratch and I also make printable kits, so let me be straight with you. Building your own is great fun and costs next to nothing, and there's nothing like hiding an in-joke your kid will spot immediately. But it does take an evening or three, and there's one thing you can't have: you can't play. You know every answer, so your job is running the room.
A ready-made kit costs money and takes the designing away from you — which is the whole point, if what you want is the game night rather than the project. Ours are around $35, you print them at home, and the app walks the players through and hands out the hints, so you can actually join in. And you can play it again with the next group.
There is a middle option too, if you like the idea of choosing your own puzzles but not of inventing the whole thing: Crack the Safe hands you the puzzles and the safe, and you decide which ones to use and how long the game should be.
If it's your first time, honestly? Play a ready-made home escape room kit first to see how it feels from the inside, and design your own for the next birthday. You'll have a much better sense of what makes a room flow.